Showing posts with label DIY. Show all posts

Saturday, February 17, 2007

Draft Craft Manifesto (REPOST)


Ulla-Maaria Mutanen has figured out why we enjoyed and even embraced crafting with her Draft Craft Manifesto:

I've been trying to pin down what is driving the increasing popularity of crafting for a while now. This is what I've got so far:

  1. People get satisfaction for being able to create/craft things because they can see themselves in the objects they make. This is not possible in purchased products.
  2. The things that people have made themselves have magic powers. They have hidden meanings that other people can't see.
  3. The things people make they usually want to keep and update. Crafting is not against consumption. It is against throwing things away.
  4. People seek recognition for the things they have made. Primarily it comes from their friends and family. This manifests as an economy of gifts.
  5. People who believe they are producing genuinely cool things seek broader exposure for their products. This creates opportunities for alternative publishing channels.
  6. Work inspires work. Seeing what other people have made generates new ideas and designs.
  7. Essential for crafting are tools, which are accessible, portable, and easy to learn.
  8. Materials become important. Knowledge of what they are made of and where to get them becomes essential.
  9. Recipes become important. The ability to create and distribute interesting recipes becomes valuable.
  10. Learning techniques brings people together. This creates online and offline communities of practice.
  11. Craft-oriented people seek opportunities to discover interesting things and meet their makers. This creates marketplaces.
  12. At the bottom, crafting is a form of play.

For me, whether it's woodworking, LEGOs, writing, drawing or even blogging, I believe that there is wellspring in creativity in each of us that our Creator placed in each of us. The things I can't craft are meant to be enjoyed via other vessels such as poetry, music, sculpture, dance, etc. I think the key is that we strive for excellence; that's where the deepest sense of pride and personal gratification comes from when we hear "well done".

My kids have made birthday and Father's Day cards for me on construction paper with collage images - these I cherish greatly. Maybe there is something to offering hand crafted gifts at Christmas or other times; could it be that a crafted gift is a among the deepest expression of love?

Wednesday, December 06, 2006

Cabin Fever

On days like today when it's too cold outside, I get really itchy to build something out of wood to knock off the winter cabin fever. Next year when spring fever breaks out, I'm building a shed. My neighbor and I went down to the country to visit some folks we know and I was inspired.


What I want for Christmas (and it's on the way) is a power nailer, the kind that hooks up to a compressor. Meanwhile, I'll just go wander around Lowe's to get out of the house.

Tuesday, November 21, 2006

I can build that...

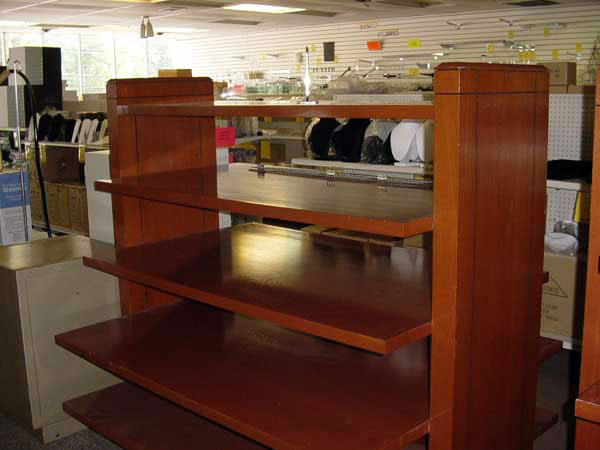
One of the things that drives Mrs. WonderDawg a little crazy is whenever we go out and about in the mall, I'll see a display table or a fixture with shirts and pants neatly stacked on top that is unique or different.


I'll say to myself, "I wonder if that will work in my garage..." At which point, I'll stop and look at the fixture for construction details and see how everything is pieced together.

Some of my favorite stores with practical fixtures include Old Navy with their modular display shelves on big casters, Pottery Barn with their shelves and other department stores with their custom mill work.

I did build a replica of the Pottery Barn shelves to place my tools on with mixed results. The finished project ended up being too top heavy with much weight and small caster wheels. The Pottery Barn store fixture is permantly anchored for greater stability. At the time, the manager was skittish on letting me take photos or measurements, so I had to rely on pencil sketches or peering through the windows when the store was closed.

I have to build something less ambitious - like this Titans mailbox that I saw in Berry Hill. This I can do, but I already have a wooden mailbox...


Perhaps an outdoor plant stand?

Saturday, October 28, 2006

The discontent of overpaying

Nothing stirs up discontent or dissatisfaction more as a consumer than checking prices AFTER making a purchase.

I've learned a long time ago to curb my impulsive buying habits and credit card stress by purchasing electronics / gadgets with proper due diligence by shopping around and settling on the final purchase. Back before the Internet, it meant reading the Sunday ads, going in the store undercover - meaning not having an eager beaver salesclerk birddog you throughout the store.

With all things being equal, and depending on where I like to shop, i.e. for electronics, back in the old days, Circuit City over H.H.Gregg or now BestBuy over CompUSA, 90 days same as cash always won out. Surprisingly, a lot of stores will give 10% extra discount by asking for it.

Discounts on power tools? Forget it! The local pawn shop is the only place making deals and usually the tools belong to some down-on-his-luck-carpenter who has to sell his tools from his livelihood to make ends meet. I don't want any part of that. They could be stolen tools too.

These days with internet access and Google for price shopping, I've gravitated to Buy.com, Apple, Amazon or a handful of boutique speciality stores. My friend, Steve has a geek approach to getting the best deals.

CNN Money has an article on The best time to buy everything.

So last week, I'm out and about shopping with my family for PUMPKINS.... I've never bought pumpkins before.

This particular place in Belle Meade had an precise pricing methodology.


From bottom to top: $1.00 to $12.00 and up (see the extra pumpkin to the right? That's my $8.00 selection)

Pick the pumpkin and they will price the pumpkin to the approximate size. So if your pumpkin is larger than the $7.00 standard and smaller than $8.00... hey, they'll eyeball it in .25 cent increments!


(here's Gary & Megan with one of the pumpkins)

When done, I'm thinking these pumpkins are expensive! Two for $18.00. Since a big church was selling them, I'm thinking they had an extra middleman in the mix plus a Belle Meade upcharge.

Afterwards, we head over to Walmart for Halloween decorations and while having fun with the family with Elmo buckets and rats eating your skull headwear, I make the mistake of looking at the Walmart pumpkins - $2.77 each!!!

Jag, I feel your pain... The Great Pumpkin sticker shock hit me square in the gut like I got overcharged big time with a smile.

Ridiculous!

On the other hand, I would look pretty stupid returning two pumpkins without a receipt. And I did get to take pictures of my kids in a pumpkin patch setting. Not so at Walmart.

So much for being frugal... (or some say cheap).

Monday, August 21, 2006

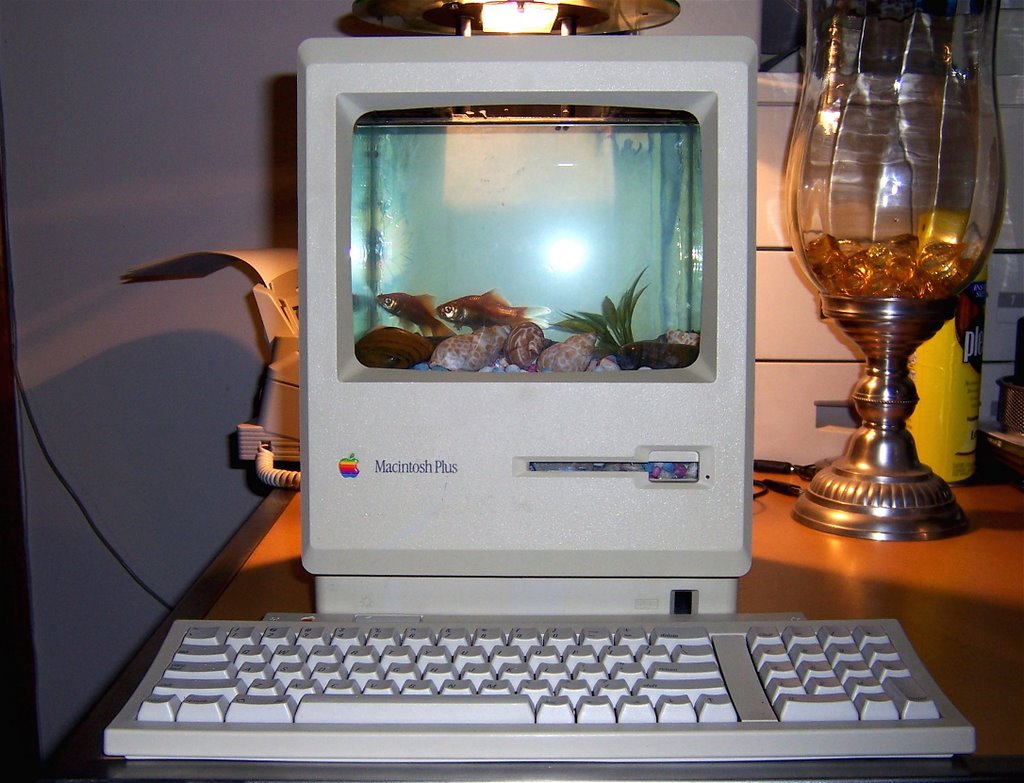
My Macintosh is swimming!


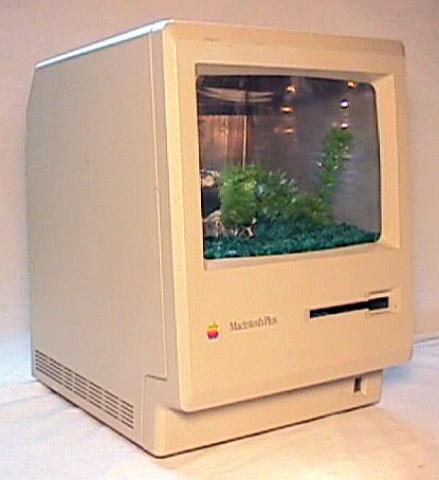
After a period of busyness and multiple distractions, I have finally finished pimping my Macintosh Plus into a working aquarium with three goldfish.

Last night, I search around for some spare album covers to use for a background against the case... but went the lazy route and used three sheets of greenish stationary paper of a garden background. I'll have to search for some art that will give the background a more visual "pop".

I decided to go cheap on the budget by seeing how these .29 cents goldfish do before I go full tilt boogie with the pumps, filter and more exotic and expensive fish. I make the goldfish sound like they're the lower end of the food chain, so I'm sorry if any fish aficionados are offended. At the least, there are no cats present!


Once the tank was filled with rocks and water, the computer case was heavy to move! The front casing was hard to put back on because of the bowing on the bottom of the shell from the weight.


I'll probably build another one shortly since I have the glass, three more Macintoshs and the know how to assemble another one quickly.

Overall, it was fun and relatively easy to build. $25.00 for the glass, $10.00 for the silicon glue, recycling an old Macintosh and my time was all it took! I just knew that twenty two years later, these Macs would be useful!

technorati

Recap:
Part One
Part Two
Part Three
Part Four

Monday, July 17, 2006

One Man's Scrap...

... is Another Man's Project.

One of the neat things about Craigslist is the free stuff that is available. People are always dumping things that have some value to someone else. Moving boxes, furniture, TV's, sofas and other items are always available. It's the online version of dumpster diving.

Of course there is the misguided attempt to cloak something as "FREE" when in reality the ad should be under the category of "HEY SUCKER!" like this listing:

FREE WOOD - We have a Tree that needs to be cut down and you can have the wood!

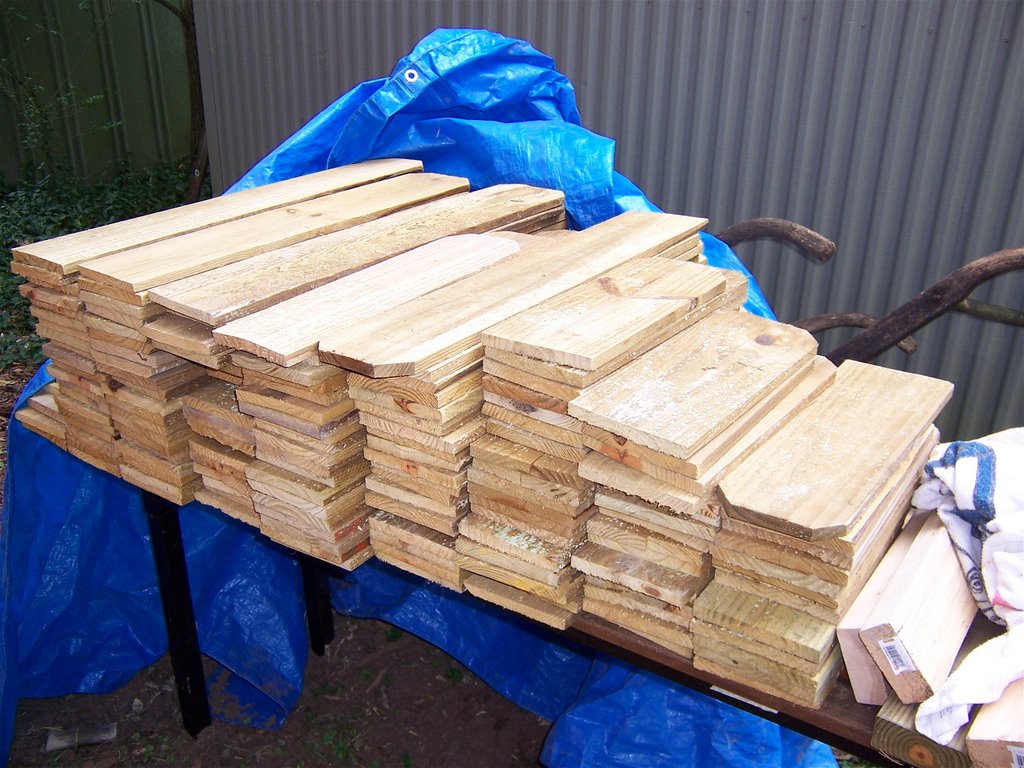
Anyway, I got some free scraps of treated wood fencing left over from a fence installation and as advertised, the lengths were 2 to 3 feet in length. So I drive up near the Ashland City exit and loaded up the back of the van - twenty minutes tops.


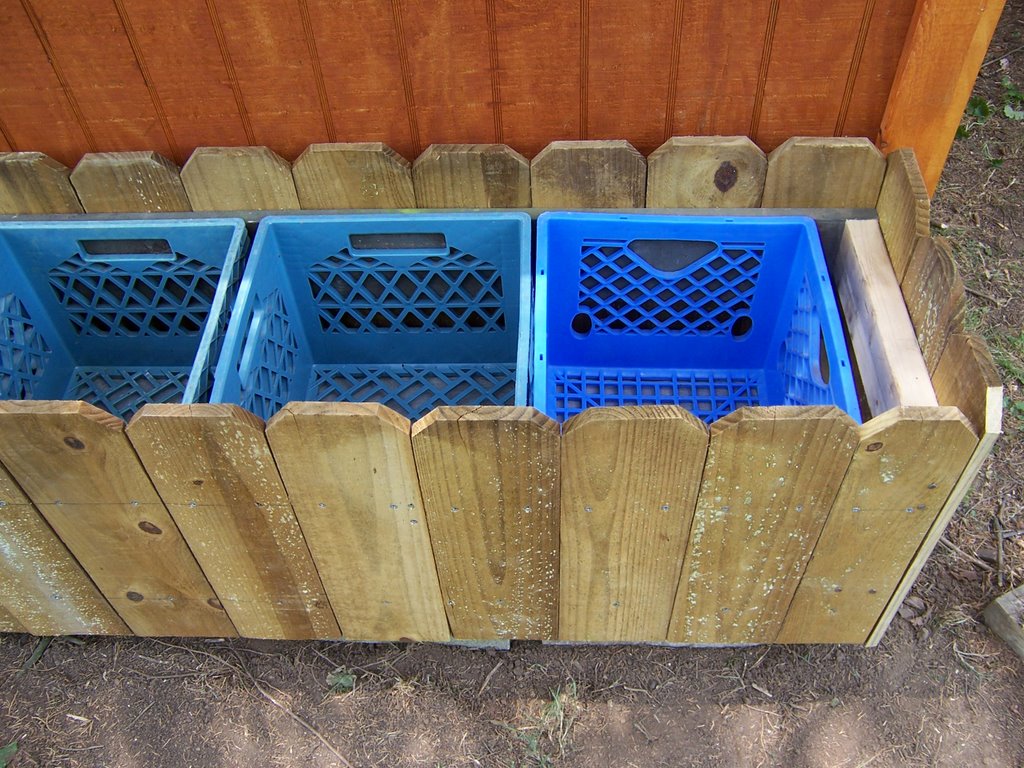
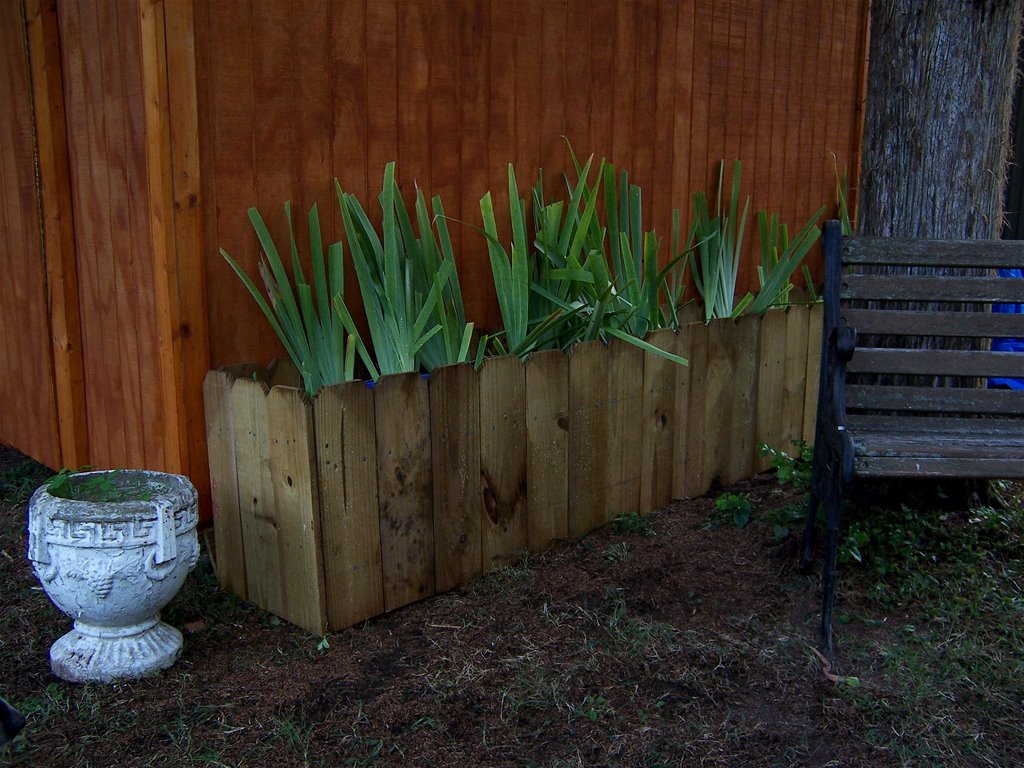
Long story short - over the weekend, I turned the scrap fencing into a planter box to accent the length of my new shed. Here 'tis:

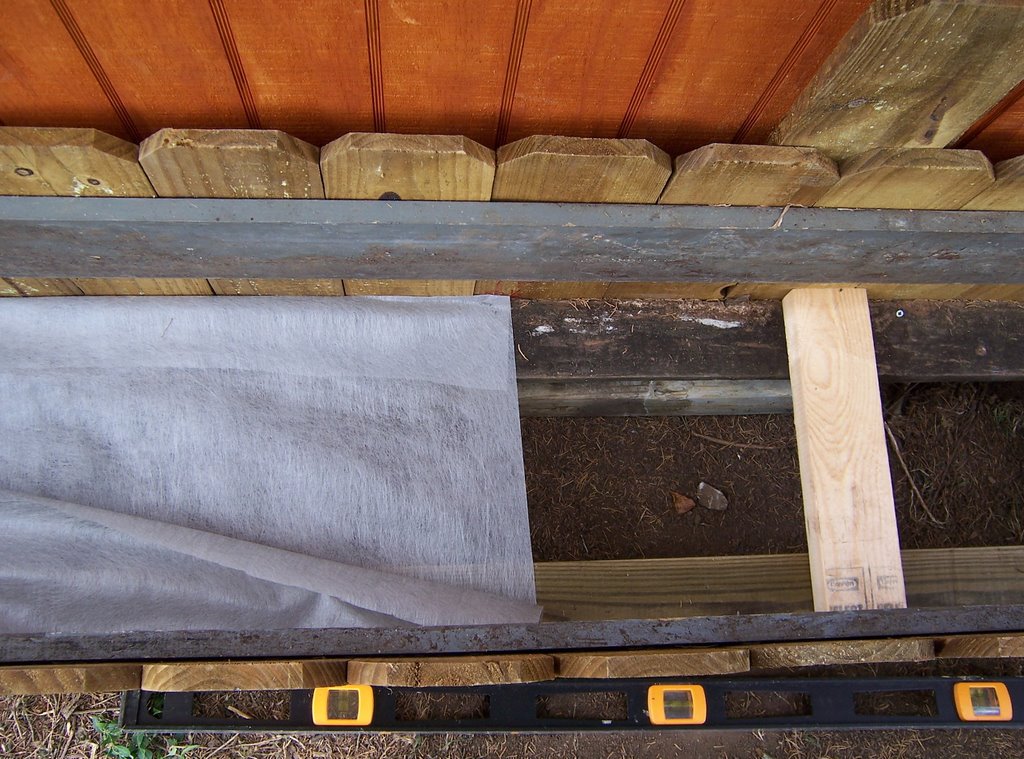
The concept behind the planter is to keep the grass out of the dirt, so the boxes (plastic milk crates) are elevated off the ground by 2 x 4's running the length of the fencing (to hold the crates). I used scrap 1 x 6" to screw the fence planks in line. I then stapled to the 2 x 4 frame landscape fabric to catch any dirt from the openings in the crates.


If I wanted to clean out the plants or dirt, I can simply pull out one crate at a time. The fencing encases the eight crates which are 13" x 13".

In goes the potting soil and transplanted yellow iris and FREE blue iris from Craigslist.


Saturday, July 15, 2006

Pimping my Mac continues

Upon a recommendation from Lowes, I went to Russell's Glass & Mirror to get the glass I needed to build the tank. For $27.00 and next day service, the glass was cut to spec, 1/4" in thickness and the edges polished to a flat surface eliminating and sharp edges. I highly recommend Russell's Glass & Mirror as the local source for custom glass work and cutting! I purchase two sets of glass since I'm building two Mac Aquariums, plus the second set of glass served as backup insurance in case of any breakage or goofups.

Having the 1/4" glass versus the specified 1/8" will make gluing easier and provide a study tank.

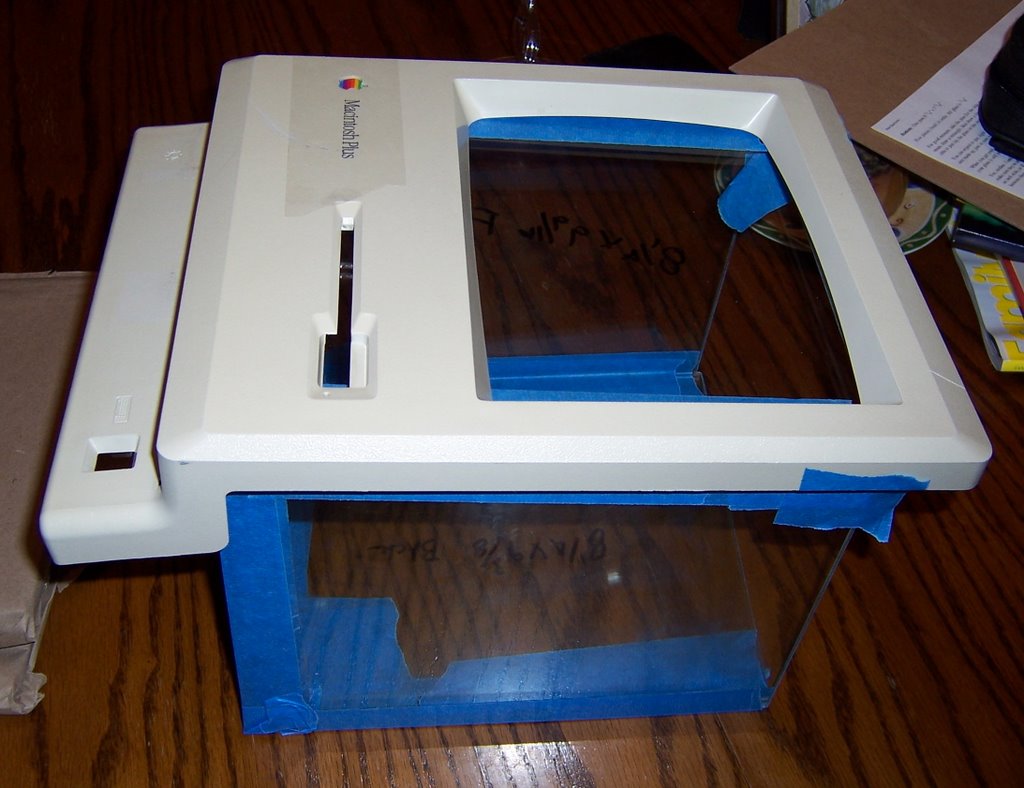
I taped together the pieces to test fit the tank into the Macintosh case. Perfect!


I should have plenty of space at the top to avoid filling the water to the very top of the tank while keeping the water line above the monitor opening.


All that's left to do is adhere the pieces with aquarium silicone ($9.00 at PetSmart); let it dry for 48 hours and later, apply the silicone to all of the inside surface seams. After that dries, I'll do a leakage test, which basically involves setting the tank on top of newspaper, filling with water and letting it sit for a week to check for any leaks.

Meanwhile, I need to build a pedestal out of wood for the tank to sit on which I'll do this weekend.


With the openings in the back of the case, I can run any neccessary wires or tubes needed.


Then, its time to go back to PetSmart and pick up all of the accessories. Pump, filters, light, trinkets and later fish!

Andy Inhatko's Abbreviated Directions:
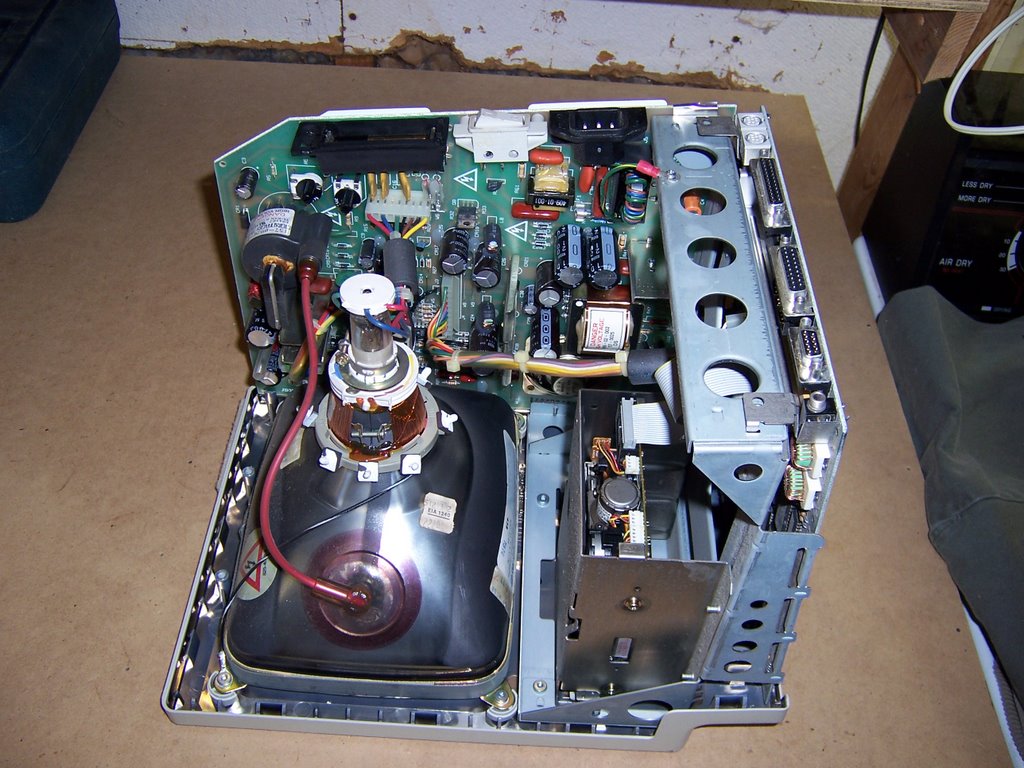
1) Remove everything non-plastic from the Macintosh shell.
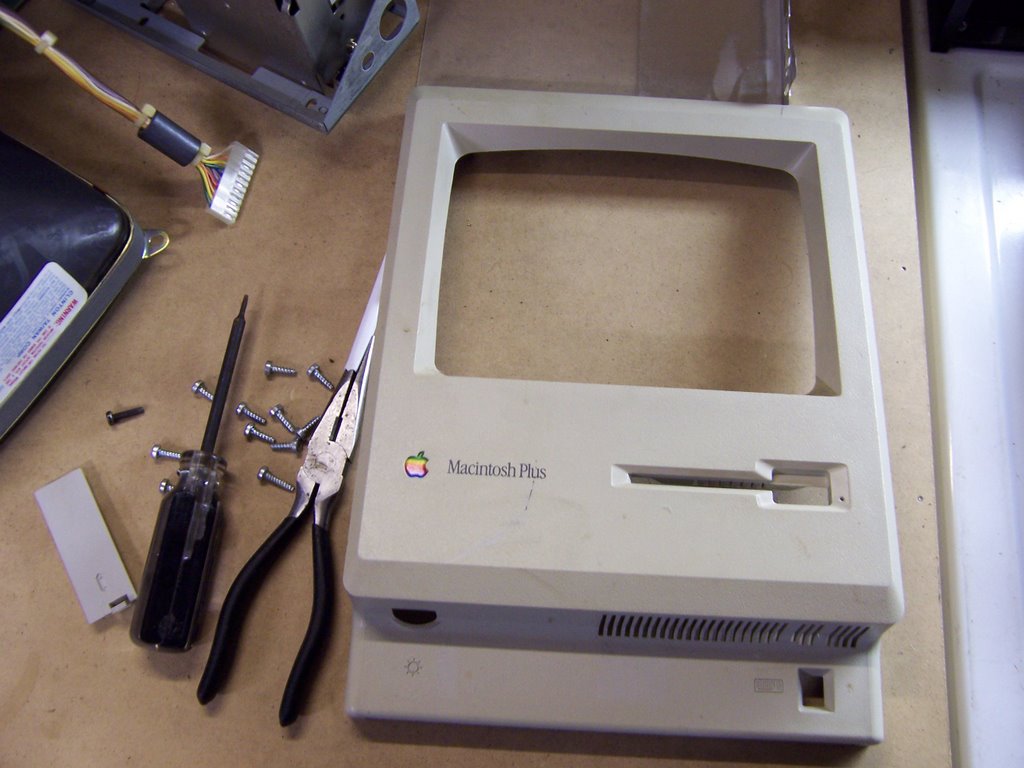
2) Remove the front bezel. File/saw down posts and fittings.
3) Saw out handle basket from back of shell. Smooth down rough edges.
4) Test glass for correct size and fit.
5) Assemble tank with silicone adhesive. Let stand at least 24 hours. Waterseal all interior edges with thick bead of silicone. Let stand at least 48 hours.
6) Build platform.
7) Test tank for leaks.
8) Test-fit tank and platform inside closed shell.
9) Wash gravel.
10) Move MacQuarium pieces to final resting place. Fill with gravel.
11) Attach air hoses to in-aquarium items. Plug hoses into gang valve.
12) Embed in-aquarium items in gravel.
13) Close up semi-configured tank and platform inside shell. Move gang valve to hang off back
of shell.
14) Fill tank with water halfway. Check to see that aquarium items' placement hasn't been disturbed, then fill rest of way.
15) Connect air pump to check valve, check valve to gang valve, and plug in air pump. Adjust flow of air to individual items with valves.
16) Let system settle down, then add water conditioner, test and correct pH.
17) Let system rest for a day before adding fish one at a time.

technorati

Wednesday, July 12, 2006

Pimping my Mac update

Tuesday while in the Cool Spring area, I stopped into three pet stores, Bed & Bath, Linens & Things and Hobby Lobby in search of a vase or starter aquarium kit I could install in my Macintosh Plus retrofitted as a Mac Aquarium. No such luck, as the the starter kits were too big or the vases were in round configurations.

It appears that I will have to construct the tank in the size specified:

8 1/4" wide x 9 9/16" tall and 9 1/2" deep

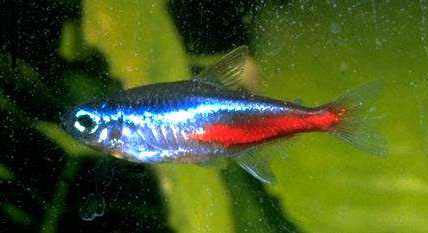
After stopping by Lowes, they don't do angled cuts, plus the glass is not 1/4" thick but rather regular pane glass for doors. The clerk helping me used to build aquariums, so we had a nice chat about the type of fish to use - not goldfish, they are messy to clean up after - but neon tetras since they are easy to care for and I can have 5 or more in the same container.


His advice was to go to a custom glass shop to get the glass I need, rather than using plexiglass.

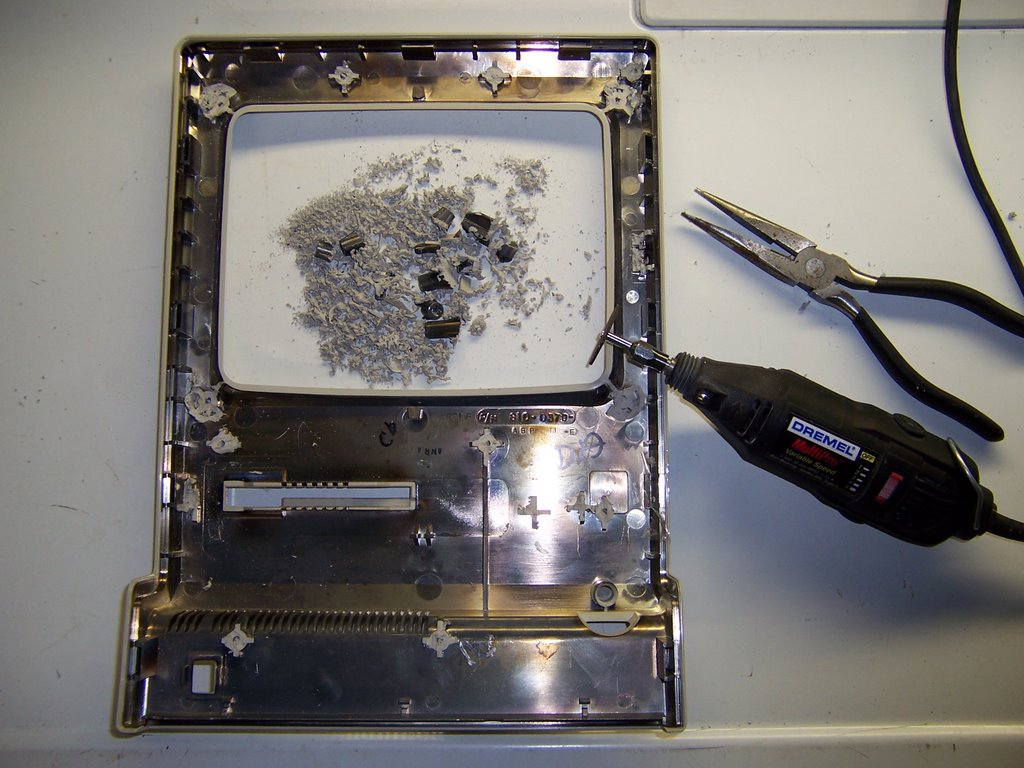
Tonight, while washing clothes and using the top of the dryer as a work surface, the cutting commenced. All of the protrutions had to be cut away so that the finished tank will be flushed with the faceplate.


Having the proper tools makes the work easy, especially a Dremel Tool with cutting wheels. I felt like a dental intern cutting away on some poor patient's mouth.


I cannot stress enough that safety glasses are a must! A hot piece of plastic jumped right into my nostril and it was the most non sensual sensation I've ever experienced. So being careful and sober is just flat out smart.

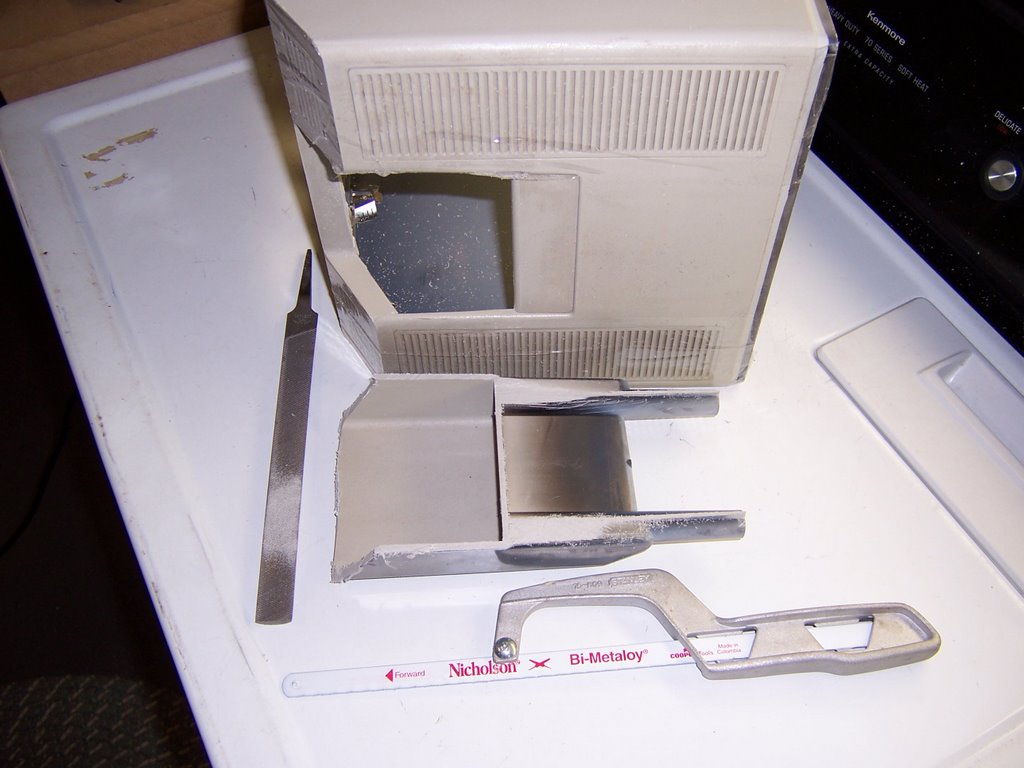
I also cut away the handle part on the top of the case. Most illustrations I've seen on the web included cutting the entire top off. I wanted to retain as much of the Macintosh case as possible while having an adequate opening for fish access and a lamp on top. Using a flat jack saw and mini hacksaw made the work easy.


I've probably spent three hours on the actual gutting and cutting on the Macintosh. Next steps are to build the tank and get all the accessories for a aquarium!

If you want to follow along and see the process of building a Mac Aquarium, I've found a new illustrated resource by Jim Lowry.

Neon Tetra photo source

technorati

Tuesday, July 11, 2006

I'm committed to pimping my Mac


It's 12:50 AM; and I need to be in Cool Springs at 7:00 AM to meetup with my Christian brothers as we're heading to Promise Keepers later in July. I just had to get started on building the Mac Aquarium... otherwise, I'll be laying in bed thinking about it.

So phase one is where I get my ya ya's out and Mrs. WonderDawg rolls her eyes...


The Macintosh Plus has been gutted... But since I'll be in the Cool Springs shopping area, I can take the empty case with me should I find a vase that will fit. Otherwise, I have to build a plexiglass or glass container, which seems to be the most intimidating part of this project.


I found some really detailed instructions by Andy Ihnatko; the kicker is that each of these completed aquariums will weigh 30 lbs each when finished. The author advised that fish upkeep is a very necessary thing, especially changing water and keeping the tank clean...

"... every other month you should completely empty the tank, scrub it down with cloths and warm water (NO soap), and replace the gravel. It's a big job, and you'll have to keep your fish in the toilet bowl until you're done (joke), but it's worth it in terms of Having A Pleasant, Non-Smelly Tank For A Very Long Time.

For this and many more reasons, you might want to build a second, backup tank. Speaking personally, it's much simpler to have another, spotlessly clean MacQuarium all set up and ready to receive the transported fish, then take your time cleaning the first one."

Looks like I'm building TWO Mac Aquariums... simple upkeep sounds good to me; why build something that is going to be high maintenance?

technorati

Monday, July 10, 2006

Pimp my Macintosh please

When digging and planting season is over, I'm turning my sights on a new project. August will be too hot to be outside, so I need to do something inside.

Everything I do or build is a mentally consuming exercise. I Google for ideas, pictures, documentation. Later I sketch, process and make the committment to get it done. But I'm such a perfectionist when it comes to building things, so I have to manage my time. I'm taking a break from Legos and anything lumber related as well. I've got the power tools, the drive and a decent mechanical skill set and gritty tenacity to see it through. Except software. PhotoShop? Building a web page? Nope, I like the physical things in life.


So here's my newest project. I'm recycling my one of my four original Apple Macintoshes into an aquarium. I have the 128K, 512K, Plus and Classic form factor to choose from. I think I will use the Plus on the left as it is discolored from age, so I plan to speckle paint the case as well.

I've heard of kits where the tank was pre-molded to fit the monitor opening, and it was a complete solution with pumps, lights, filter and all of the accesories that would normally go into an aquarium. Just add water and goldfish.

But alas, no such luck. I have to build one from scratch using some online instructions and galleries for inspiration.


So here goes! My first task is to find a vase that will fit, so after my Mothership BBQ lunch, I'll scout out the 100 Oaks area - Michaels, PetSmart, Expo Center and Home Depot.


I've got the Dremel tools and some allotted time to build this Mac Aquarium and document the project with photos.

Is there anyone in the Nashville area who has built one? If so, I'd like to visit with you and learn some tips.

Mrs. WonderDawg is not fond of fish, but my son and daughter are, so I think I have some emotional support I can tap into.

Plus these Macs originally belonged to them anyway, so I'm just pimping them out.

Fo' shizzle!

technorati

Wednesday, December 21, 2005

For 2006, I resolve to be more productive and... Wacky!


Discover hundreds of little-known uses for well-known products... at Wacky Uses

Joey Green, "a modern-day (and male) Heloise" has got you covered with wacky uses and solutions:

Remove scuffs on shoes. Apply Colgate toothpaste with a tissue, rub, and wipe off.

Soothe canker sores. Eat two servings of Dannon Yogurt a day until the sores clear.

Clean soap scum from shower doors. Mix one capful of Downy Fabric Softener with a quart of warm water in a plastic bucket, and use a clean cloth to wipe the shower doors clean.

Style your hair. A teaspoon of Jell-O dissolved in a cup of warm water makes an inexpensive setting lotion. Or use prepared Jell-O as you would any hair gel product.

Store valuables. Make a two-inch slit along one seam of a Wilson Tennis Ball, then place valuables inside. If you hide the doctored tennis ball among your other sports equipment, remember not to use it.

and my favorite:
Make Wine Jell-O. The Joy of Cooking suggests boiling one cup water, mixing with gelatin powder in a bowl until dissolved, then adding one cup red wine. Stir well, then refrigerate for four hours or until mixture gels. Serves four.

Tuesday, December 13, 2005

Postage Paid Envelope Revenge


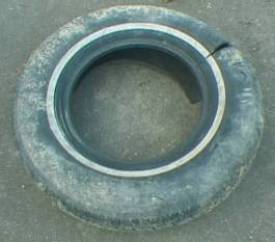
Tired of receiving mounds of unsolicited letters and offers in the mail? Want to fight back? Want to get rid of that old tire in your garage that the garbage man won't take?

Then read on......

Saturday, November 05, 2005

Draft Craft Manifesto


Ulla-Maaria Mutanen has figured out why we enjoyed and even embraced crafting with her Draft Craft Manifesto:

I've been trying to pin down what is driving the increasing popularity of crafting for a while now. This is what I've got so far:

  1. People get satisfaction for being able to create/craft things because they can see themselves in the objects they make. This is not possible in purchased products.
  2. The things that people have made themselves have magic powers. They have hidden meanings that other people can't see.
  3. The things people make they usually want to keep and update. Crafting is not against consumption. It is against throwing things away.
  4. People seek recognition for the things they have made. Primarily it comes from their friends and family. This manifests as an economy of gifts.
  5. People who believe they are producing genuinely cool things seek broader exposure for their products. This creates opportunities for alternative publishing channels.
  6. Work inspires work. Seeing what other people have made generates new ideas and designs.
  7. Essential for crafting are tools, which are accessible, portable, and easy to learn.
  8. Materials become important. Knowledge of what they are made of and where to get them becomes essential.
  9. Recipes become important. The ability to create and distribute interesting recipes becomes valuable.
  10. Learning techniques brings people together. This creates online and offline communities of practice.
  11. Craft-oriented people seek opportunities to discover interesting things and meet their makers. This creates marketplaces.
  12. At the bottom, crafting is a form of play.

For me, whether it's woodworking, LEGOs, writing, drawing or even blogging, I believe that there is wellspring in creativity in each of us that our Creator placed in each of us. The things I can't craft are meant to be enjoyed via other vessels such as poetry, music, sculpture, dance, etc. I think the key is that we strive for excellence; that's where the deepest sense of pride and personal gratification comes from when we hear "well done".

My kids have made birthday and Father's Day cards for me on construction paper with collage images - these I cherish greatly. Maybe there is something to offering hand crafted gifts at Christmas or other times; could it be that a crafted gift is a among the deepest expression of love?